Validation & fixes
Overcam
Prepare pocket corners at the part boundary for CNC routing — where a round cutter needs the pocket toolpath to oversail the cut.
Overcam prepares pockets that open onto an outside edge of the part. A round end mill cannot reach a perfectly sharp internal corner; overcam extends the pocket geometry so the pocket toolpath can oversail the nominal boundary and cut fully into the corner. It is not the same as dogbones, which relieve internal corners so a mating part can fit — overcam works the other way around, on pocket floors at the part edge.
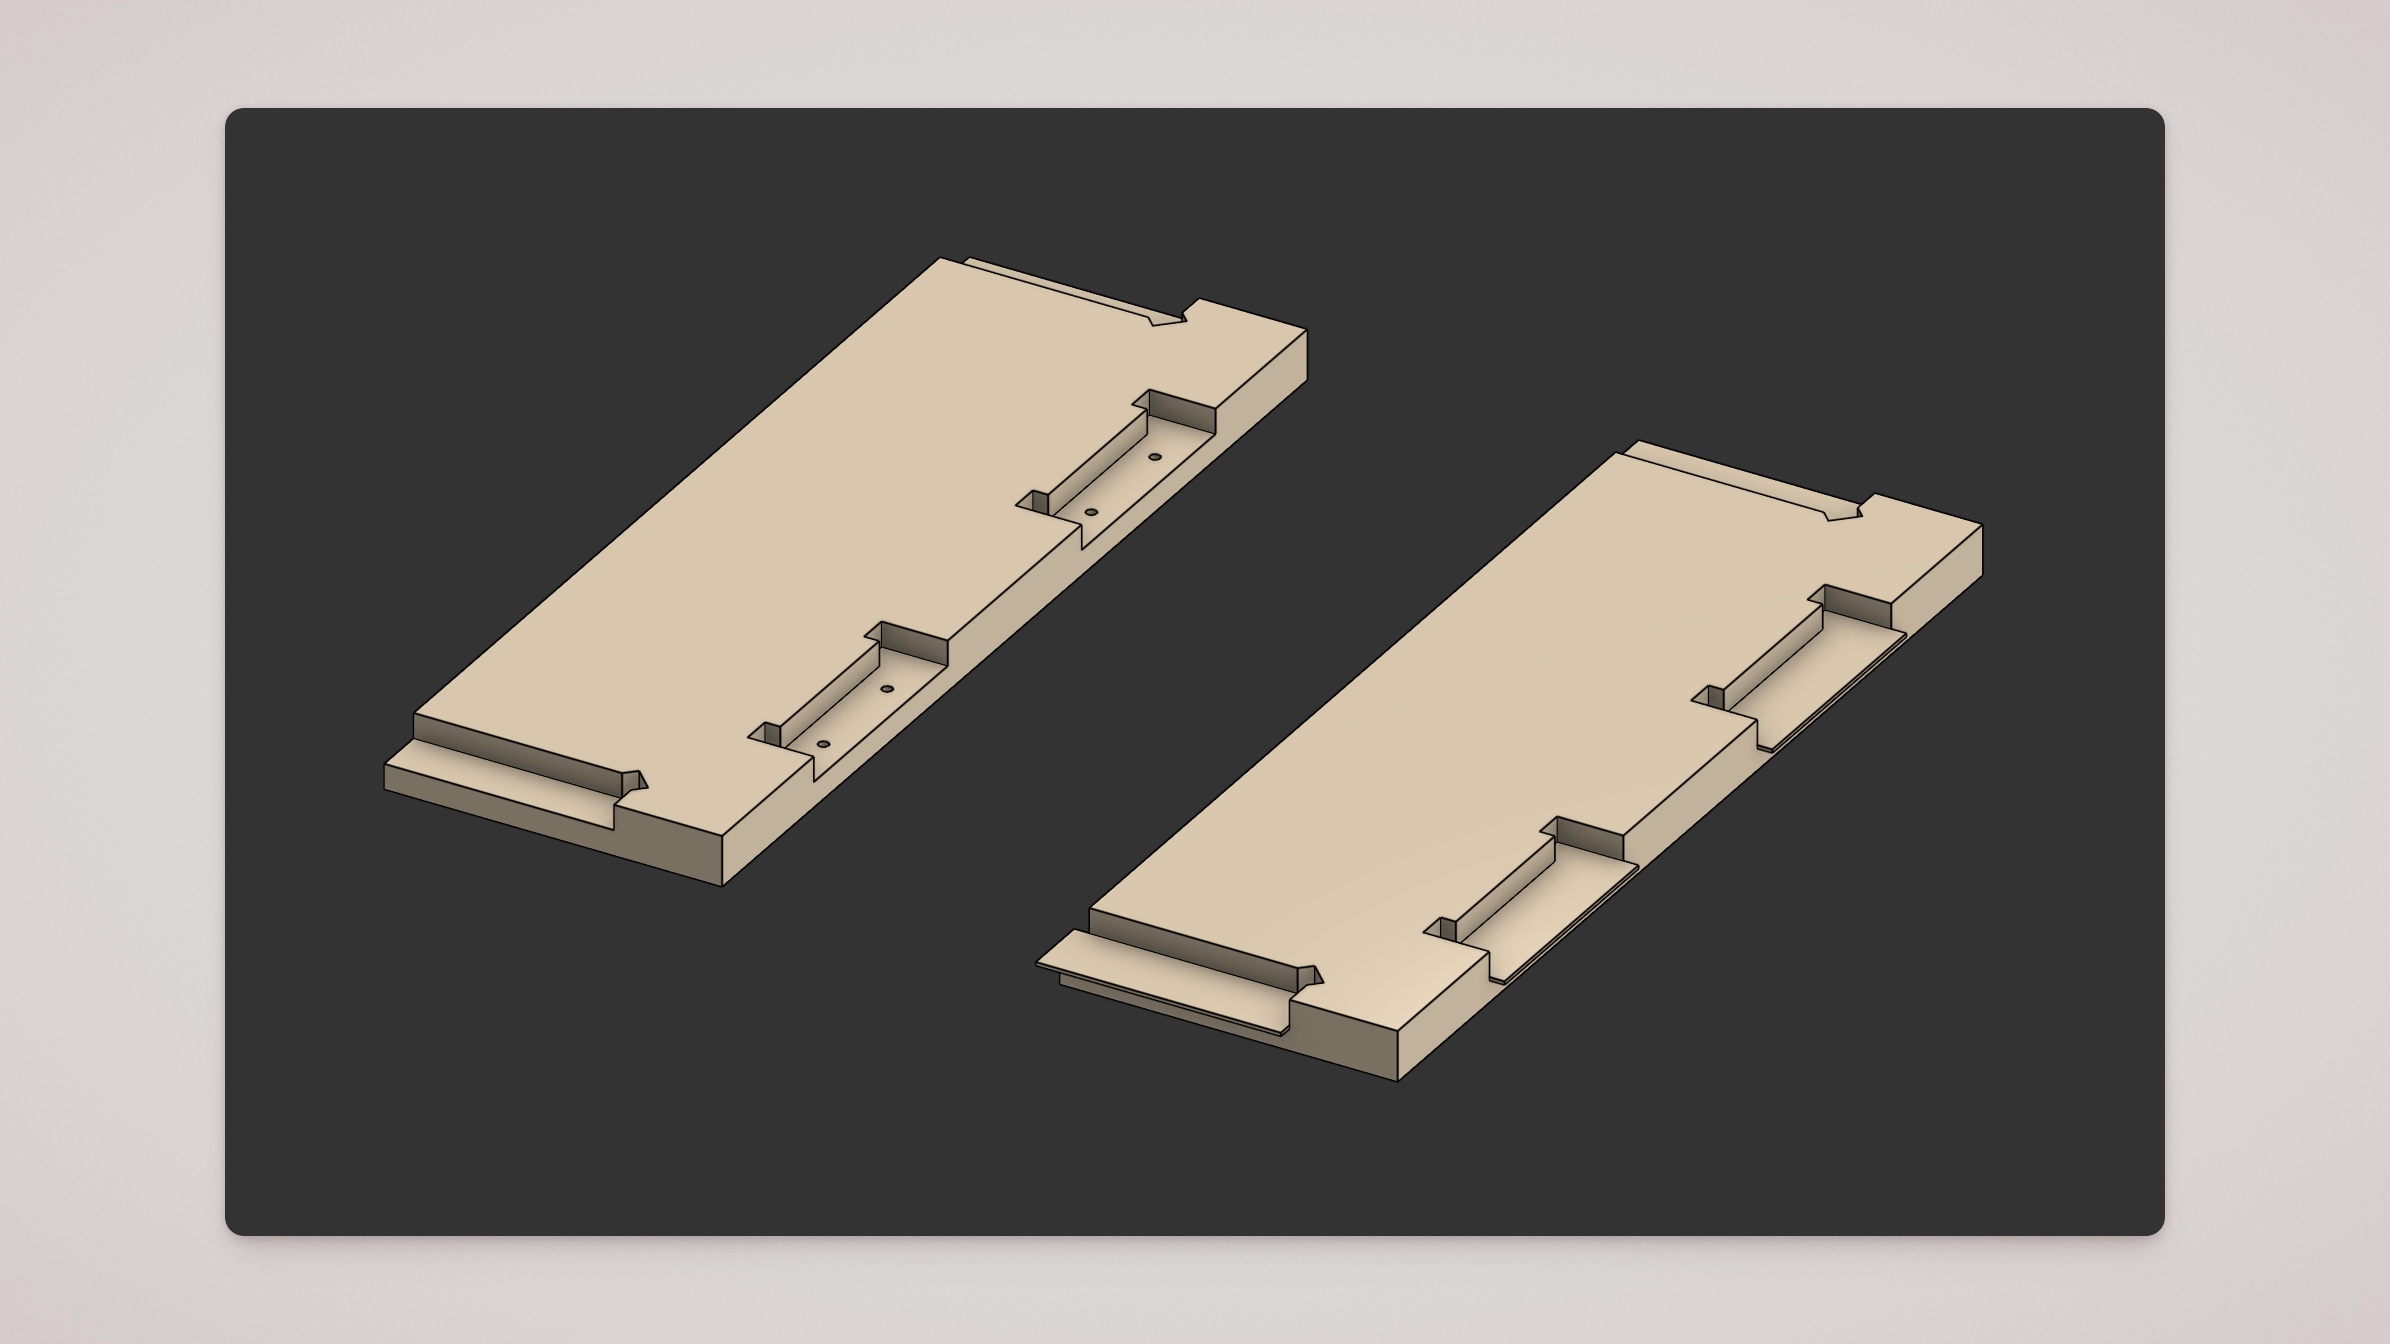
Left: pocket at the part edge without overcam. Right: the same part with overcam applied — pocket floors extend past the edge so the toolpath can oversail the boundary.
Overcam geometry is the pocket toolpath extruded by the overcam thickness and merged into the part. A pocket floor needs a clear face for the exporter to interpret, so overcam may cover the top of holes in that floor. The hole is not removed — detection uses the bottom of the hole. If a hole looks missing in the graphics view, check the underside of the part, or use translucent mode or hidden edges — the hole bottom should still be there.
If holes are less than the overcam thickness into the pocket floor, they may disappear entirely. In this case, reduce the overcam thickness in the prep feature.
When you need it
You need overcam when a pocket floor meets the part edge and a round cutter would otherwise leave a radiused corner or uncut material at the boundary. These are common on sheet parts — slots, pockets, and cut-outs that run out to an outside profile.
Validation will warn when a part needs overcam and the DXF Export Prep custom feature has not been applied. The check is reliable: if you see an overcam warning, add the prep feature (or review why the geometry was flagged).
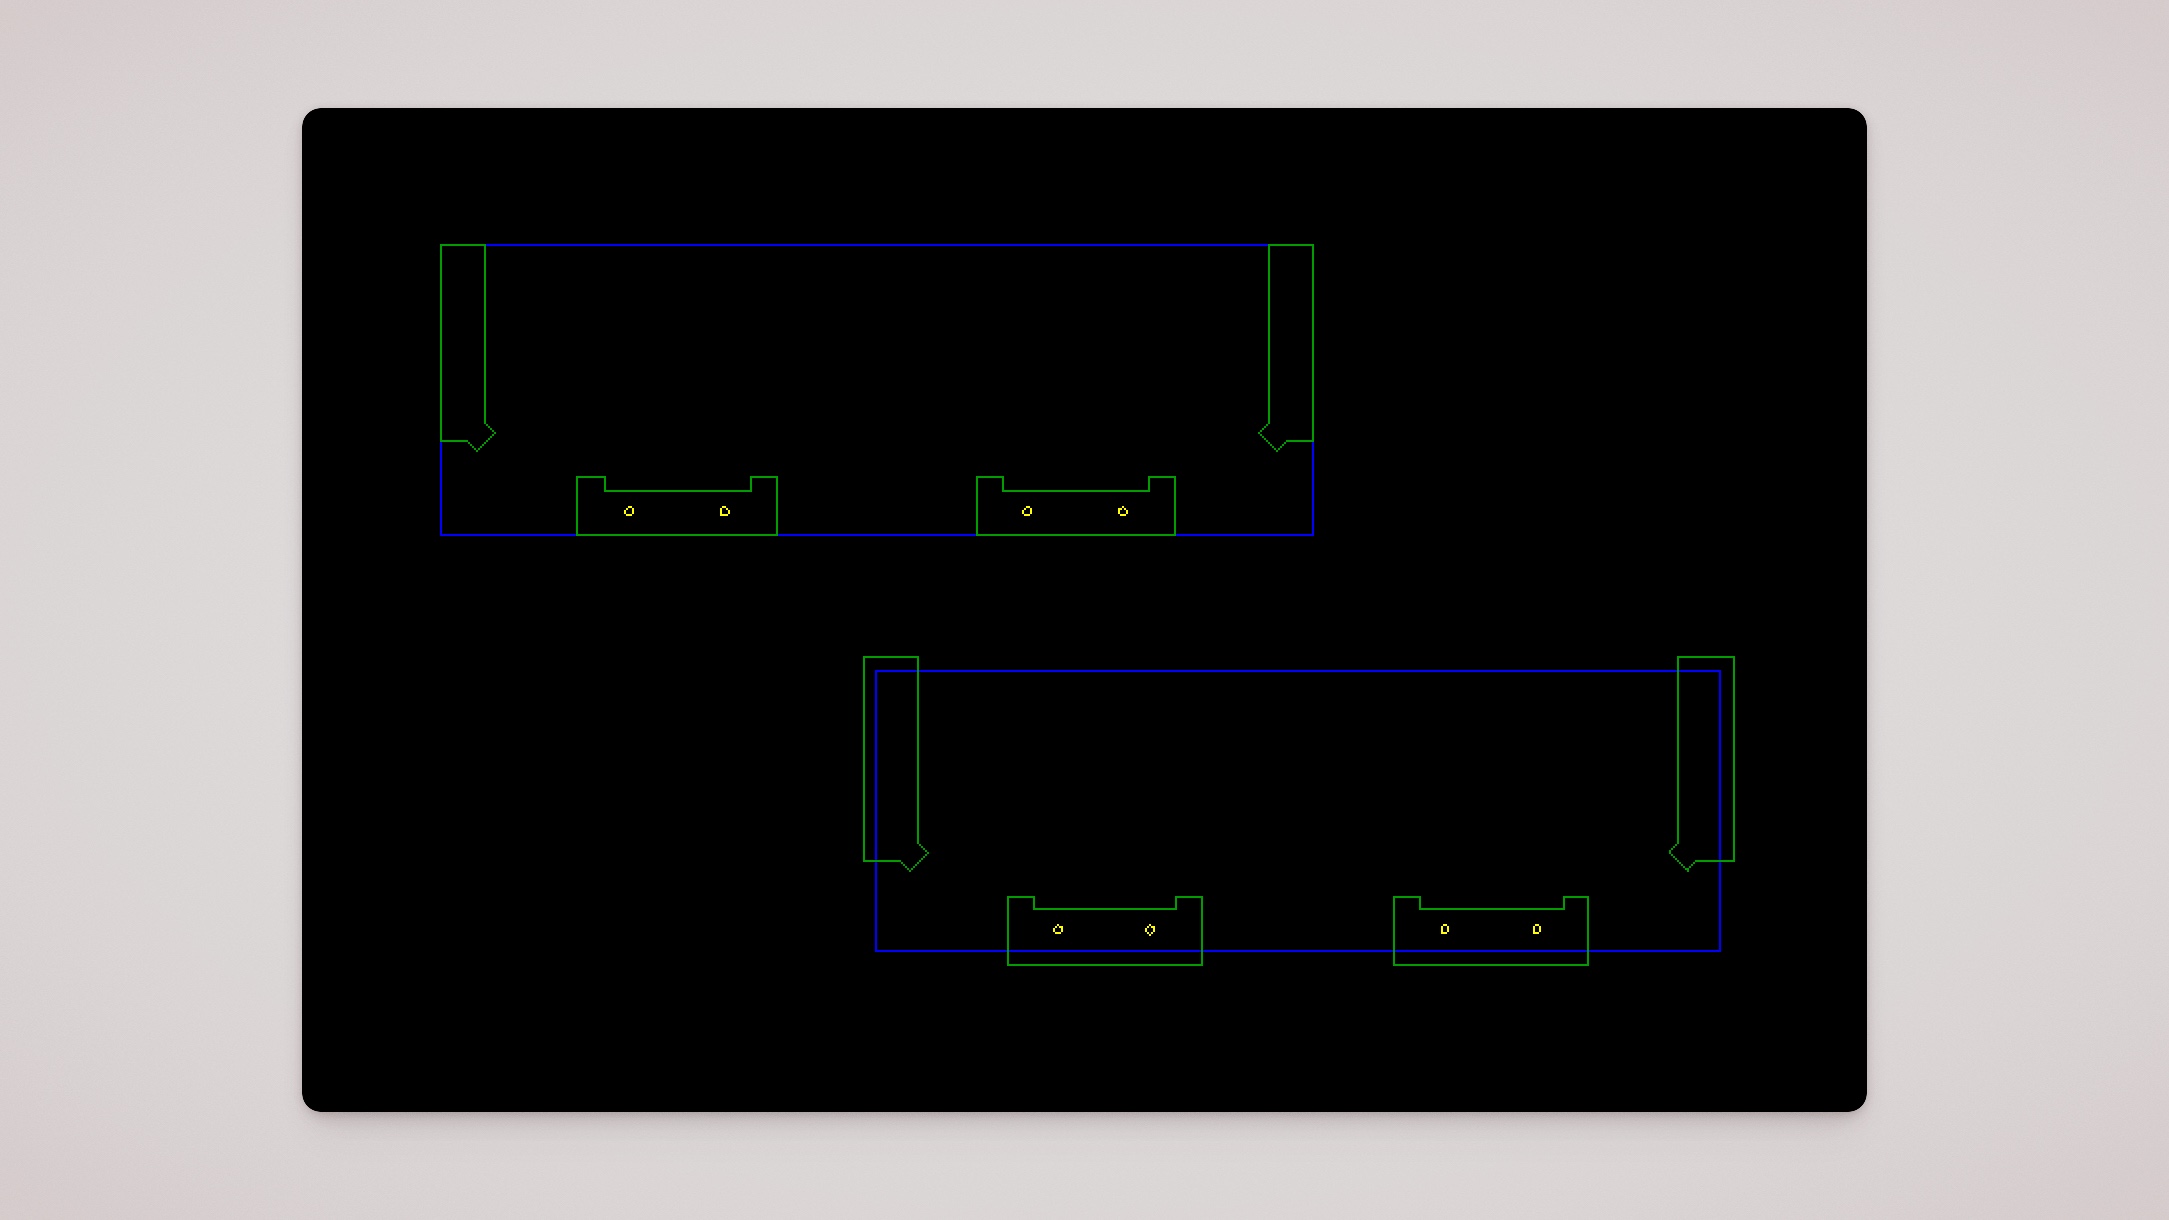
Top: pocket paths stop at the part boundary. Bottom: overcam extends pocket paths past the edge so the cutter can oversail into the corner.
Adding overcam with DXF Export Prep
Use the DXF Export Prep custom feature to apply overcam to selected parts. Insert the feature in the Part Studio, enable overcam for the parts that need it, then run validation again.
Set the cutter diameter in the prep feature to match the tool you plan to use — overcam geometry is sized from that value.
Do not add features downstream of DXF Export Prep. Later geometry can undo or conflict with the relief the prep feature creates. See DXF Export Prep for install steps and the full list of prep actions.
Checking the result before export
Revalidate in DXF Exporter, and confirm the overcam warning clears. Use the DXF preview to check that pocket paths at the part boundary look sensible — the toolpath should oversail over edges where overcam was applied.
If the warning remains, review the prep feature inputs and whether overcam was applied to the correct parts. See Validation warnings for what each status means.